説明
アクセシビリティを意識したハンバーガーメニューを作成します。
使用するライブラリ
なし
手順
手順1(HTML)
ハンバーガーメニューのトグルを<button> 、展開されるナビゲーションを<nav>でマークアップします。
ボタン (button) ロールは、ユーザーによってアクティブ化されたときに反応を引き起こすクリック可能な要素に使用する必要があります。
<button></button>
<nav>
    <ul>
        <li><a href="#a">MENU 1</a></li>
          <li><a href="#b">MENU 2</a></li>
          <li><a href="#c">MENU 3</a></li>
          <li><a href="#d">MENU 4</a></li>
    </ul>
</nav>
ただ、これではアクセシビリティ的には不十分なので情報を追加していきます。
<button>はデータ送信するためのものではないのでtype="button"を明示。- ボタンの目的を示すテキストがないため、
aria-label="MENU"を追加。 aria-controlsで操作する対象のidを指定し、デフォルトでメニューは閉じているのでボタンにはaria-expanded="false"を、ナビ側にはaria-hidden="true"を指定。
JS/CSSで使うclass・idも追加し、出来上がったHTMLが下記になります。
<button
    id="toggle"
    class="toggle"
    type="button"
    aria-label="MENU"
    aria-controls="nav"
    aria-expanded="false">
    <span></span>
</button>
<nav id="nav" class="nav" aria-hidden="true">
    <ul class="menu">
        <li><a href="#a">MENU 1</a></li>
        <li><a href="#b">MENU 2</a></li>
        <li><a href="#c">MENU 3</a></li>
        <li><a href="#d">MENU 4</a></li>
    </ul>
</nav>
手順2(CSS)
トグル
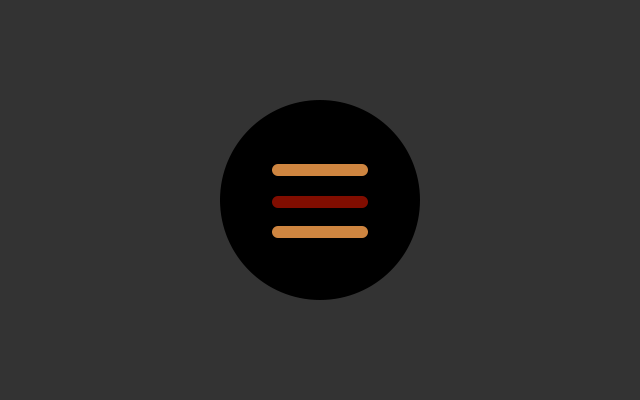
ハンバーガーメニューの「≡」部分は <span> ::before ::after で。aria-expanded の状態で「≡」「×」の切替をします。
※ .-closeは × → ≡ のアニメーションのために用意した class です。
.toggle {
  & {
    appearance: none;
    position: fixed;
    top: 25px;
    right: 25px;
    z-index: 101;
    display: block;
    margin: 0;
    padding: 0;
    width: 60px;
    height: 60px;
    border: none;
    border-radius: 50%;
    background-color: black;
    transition: background-color 0.2s ease;
    cursor: pointer;
  }

  > span,
  &:before,
  &:after {
    position: absolute;
    top: 50%;
    left: 50%;
    display: block;
    margin: -2px 0 0 -15px;
    width: 30px;
    height: 4px;
    border-radius: 2px;
  }

  > span {
    background-color: maroon;
    transition: opacity 0.3s ease;
  }

  &::before,
  &::after {
    content: "";
    background-color: peru;
    transition: background-color 0.3s ease;
  }

  &::before {
    transform: translateY(-10px);
  }

  &::after {
    transform: translateY(10px);
  }

  // メニューを開いた時
  &[aria-expanded="true"] {
    > span {
      opacity: 0;
    }
    &::before,
    &::after {
      background-color: white;
    }
    &::before {
      animation: 0.3s ease closeBar1 forwards;
    }
    &::after {
      animation: 0.3s ease closeBar2 forwards;
    }
  }
  // メニューを閉じる時
  &.-close {
    &::before {
      animation: 0.3s ease closeBar1Rev forwards;
    }
    &::after {
      animation: 0.3s ease closeBar2Rev forwards;
    }
  }
}

@keyframes closeBar1 {
  0% { transform: translateY(-10px); }
  50% { transform: translateY(0) rotate(0); }
  100% { transform: translateY(0) rotate(45deg); }
}
@keyframes closeBar2 {
  0% { transform: translateY(10px); }
  50% { transform: translateY(0) rotate(0); }
  100% { transform: translateY(0) rotate(-45deg); }
}
@keyframes closeBar1Rev {
  0% { transform: translateY(0) rotate(45deg); }
  50% { transform: translateY(0) rotate(0); }
  100% { transform: translateY(-10px); }
}
@keyframes closeBar2Rev {
  0% { transform: translateY(0) rotate(-45deg); }
  50% { transform: translateY(0) rotate(0); }
  100% { transform: translateY(10px); }
}
ナビ
ナビも同様に aria-hidden の状態で開閉を切り替えます。
※visibility は transitionや@keyframesで扱うことができます。
.nav {
  & {
    position: fixed;
    top: 0;
    left: 0;
    z-index: 100;
    width: 100%;
    height: 100%;
    display: flex;
    justify-content: center;
    align-content: center;
    align-items: center;
    overflow: hidden;
    background: #46e678;
    color: black;
    transition: opacity 0.3s ease, visibility 0.3s ease;
  }
  &[aria-hidden="true"] {
    visibility: hidden;
    opacity: 0;
    pointer-events: none;
  }
  &[aria-hidden="false"] {
    visibility: visible;
    opacity: 1;
    pointer-events: auto;
  }
}

.menu {
  li {
    font-weight: bold;
    font-size: 1.25em;
    line-height: 1.5;
    a {
      color: black;
    }
    + li {
      margin-top: 0.5em;
    }
  }
}
手順3(JS)
トグル、ナビゲーション、<body>を定数として宣言します。
y はメニュー開閉時に閲覧していた箇所のスクロールの値を格納するために使用します。
const NAV = document.getElementById('nav')
const TOGGLE = document.getElementById('toggle')
const BODY = document.body
let y = 0
メニューを開くfunctionを定義します。
function menuOpen () {
  y = window.scrollY //現在のスクロール量を保存
  TOGGLE.setAttribute('aria-expanded', 'true') // メニューが展開されるので aria-expand を true に
  TOGGLE.setAttribute('aria-label', 'CLOSE') // 閉じる役割になるのでラベルをCLOSEに変更
  NAV.setAttribute('aria-hidden', 'false') // ナビが表示されるので aria-hidden は false に
  BODY.style.position = 'fixed' // スクロールバーが二重になるのを防ぐために body の position fixed に変更
  BODY.style.top =  -y + 'px' // fixed にしても見た目が変わらないように、top に -y を代入
}
メニューを閉じるfunctionを定義します。
function menuClose () {
  TOGGLE.setAttribute('aria-expanded', 'false') // aria-expanded を false に戻す
  TOGGLE.setAttribute('aria-label', 'MENU') // aria-label を MENU に戻す
  NAV.setAttribute('aria-hidden', 'true') // 同上
  BODY.removeAttribute('style') // body に追加した position:fixed; top: -y px; を削除
  window.scrollTo(0, y) // メニュー展開時にスクロールしていた位置に戻す

  // 閉じるアニメーションのために .-close を付加し、アニメーション終了時に削除(transiton でアニメーションする場合は不要)
  TOGGLE.classList.add('-close')
  TOGGLE.addEventListener('animationend', () => {
    TOGGLE.classList.remove('-close')
  }, { once: true })
}
トグルにクリックイベントを定義します。
TOGGLE.addEventListener('click', ()=> {
  if (TOGGLE.getAttribute('aria-expanded') === 'true') { // aria-expanded が true だったら閉じる
    menuClose()
  } else { // true以外なら開く
    menuOpen()
  }
})
ナビの何もない領域をクリックしたら閉じるようにします。
※HTML/CSSの構造によっては NAVではなくその内側の要素になる場合もあるので、適宜変更してください。
// リンク以外の領域が対象になるのでタッチデバイスでは touchstart をトリガーにします
const CLICK_EVENT = 'ontouchstart' in window ? 'touchstart' : 'click'
window.addEventListener(CLICK_EVENT, e => {
  if (e.target === NAV) { // クリックした対象がNAVだった場合閉じる
    menuClose()
  }
})
今回のサンプルではページ内遷移になるのでアンカーリンクでもメニューを閉じるようにします。
document.querySelectorAll('.menu a[href^="#"]').forEach((e, i) => {
  e.addEventListener('click', menuClose)
})


